
Rye Sourdough

This recipe was taught to me by a German baker called Florian and it is one of the most simple, tasty, rustic breads I’ve ever made. Forget ‘no-kneed’ breads, forget baker’s yeast, forget delicate timings and 3am baking schedules. This is a loaf that we humans have been making since before most other breads were invented so it’s simplicity was born out of necessity, but that doesn’t take anything away from the elegant bitterness of it’s flavour. The only ingredients you need are rye flour, water and salt. You can enjoy it toasted with butter or a chunk of cheddar, or alongside a bowl of soup and even topped with jam. I eat this bread for breakfast every day and I’m yet to find a topping it doesn’t lend itself to. And for those of you with gluten sensitivity, rye flour is naturally low in gluten! Combined with the extended fermentation period of sourdough, this bread should be perfectly suitable for all.
As part of this recipe I’ll talk you through the simple day-by-day process of making your own sourdough starter, what’s happening in your starter as it develops, and what you can do to encourage the success of your wild yeasty friends. Following these steps you should have an active starter within a week, possibly even 4-5 days (although if you live in a built up area or city the quality of air could negatively effect this and slow the process).
I find that a good, robust bread recipe such as this is a fantastic way to use up leftovers and old ingredients. Much the same way that making ice cream is the best way to use up old cake, fruit and cookies, I will often throw in my old leeks, potato (baked or grated), tomato (and tomato skins) seeds, nuts, dried chunks of cheese (grated), leftover beer, scrapings from jars of mustard, sauces, miso, or a handful of fresh herbs that are past their best. If it is a flavour that suits savoriness then it will pair with rye. So enjoy getting creative and using up your scraps. Traditionally, caraway is used to flavour rye, but I use anything from coriander to nigella. Coriander gives your loaf little explosions of citrus freshness as you bite into the whole seeds and nigella gently infuses the bread with an allium aroma.
Now I’ve made sure you’re nice and hungry, let’s crack on with making your starter. You can spend the next few days fantasizing over what you’ll bake into your bread first whilst you wait.
Making Your Starter

1.5kg bag of organic wholemeal rye flour
Cold water
600g sterilized jar with lid
A spoon to stir
Step 1.
Add 50g of flour to the jar with 50ml of cold water. Mix well and leave it somewhere ambient at 20-25C / 68-77F out of direct sunlight. Make sure to place the lid on the jar to stop unwanted contamination. We use half water and half flour to create the ideal conditions for yeast. The water creates a fluid medium for the yeasts to move around in whilst the flour provides food. The reason we keep it out of direct sunlight is because yeasts are sensitive to UV light, which sterilizes a lot of microbial life forms.
Try to make sure the inside walls of the jar aren’t covered with a thin residue of slurry as this will dry out, killing the yeasts in it. In turn, this could lead to contamination of unwanted pathogens. To avoid this, push any noticeable amounts of slurry back into the body of the starter before leaving it to ferment for 24 hours.
Step 2.

The following day, the population of wild yeast* cells will have grown as they break down and metabolize the food available to them, but soon that food will begin to run out. Add another 50ml of cold water first. Mix the aged starter well to distribute the wild yeasts before adding another 50g of flour. Make sure it is all mixed well, cover with the lid, and return it to it’s happy place to sit for another 24 hours.
*The reason we call them “wild yeast” is because they are an unknown collection of yeasts that have come from the flour itself (in particular the husks, which is why I use wholemeal), the air (which is why living somewhere with clean air makes a big difference to the activity of your starter) and you (your skin, which is alive with microbes in a similar way to your gastrointestinal tract). By comparison, we have baker’s yeast or brewers yeast which are produced commercially in a wide variety of hybridized, hyper active yeasts such as dried yeast, compressed yeast, rapid rise yeast, cream yeast and yeast extract (where the yeast is heated to remove the cell wall and autolysis occurs).
Step 3.
By the third day you should notice visible amounts of air appearing in bubbles against the glass and surface of the slurry. At this stage we can officially stop calling the mix of flour and water a slurry and begin calling it a starter because it is ALIVE!
At this stage your jar may be starting to fill up with starter, so before we give it the next feeding we must discard some to make room. Think of it as managing population vs food supply. At this stage, more and more yeasts are multiplying in your starter and feeding on the flour. If we just keep adding 50g of water and flour then we’ll end up with far more hungry yeast than flour. For this reason, we discard 50g of starter, leaving us with 150g. To this we’ll then add another 100ml of cold water, mix well, then add 100g of flour. Make sure to stir it in right to the bottom of the jar and clean down the sides again before returning it to your ambient spot.
Step 4.
Continue to discard half your starter and feed (to do this, remove 150g of starter and add 100g of water, then 100g of flour as before) for the following 3 days. Following these measurements you will end up with a starter that is roughly the right size for the following bread recipe. At this stage, you may wish to empty your starter from it’s container altogether into a clean bowl. Wash the jar that it’s been living in to remove any excess crusty parts that have dried on. Dry it with a clean paper towel or air dry it before returning your starter to it’s home. It’s good practice to keep the container from building up with dried starter to lower your chances of contamination.
If you don’t like the idea of throwing out your fermented rye starter, I’ve written a couple of recipes that put it to good use; try making our rye and wild garlic soup or our spelt pancakes if you fancy feeding your sweet tooth.

Between day 7 - 9 your starter will have matured enough to make bread. At this stage you can either start using it at room temperature to produce a loaf a day, or you can store it in the fridge with a lid on tightly to slow down the activity of the yeast enough to bake a loaf per week. I keep my starter at roughly 450-500g. To find out how to make our traditional rye loaf please continue reading.
Rye Sourdough Recipe
Makes 1x 900g Loaf

475g rye sourdough starter
675g cold water
775g wholemeal rye flour
9g salt
100g mixed seeds or nuts (don’t be afraid to add much more)
1x 2lb / 1kg loaf tin
Step 1.
Begin by emptying your sourdough starter into a clean bowl. It really doesn’t matter if you’ve fed it ahead of time to make a leavan or not for this recipe. Add 475g of water and mix it together. Then add 475g of wholemeal rye flour and mix until fully combined. Clean and dry your starter’s jar, then add 475g of the freshly mixed starter back into it and return the jar to wherever you keep your starter.
Step 2.

Now add another 200g of cold water to the bowl and mix it with your remaining starter. Add 300g of rye flour, 9g of salt and 100g of seeds, nuts or whatever else you like and mix until it forms a thick, clay-like dough. Unlike wheat dough, rye will always remain sticky and won’t change if kneaded due to it’s very low gluten levels. For this reason, once your dough is combined, oil your loaf tin with a drop of oil and dust a work surface with a handful of wheat flour. Turn your dough onto the surface and sprinkle it with more flour. Using your hands like Scotch Hands (butter beaters), roughly shape the dough into the dimensions of a house brick. You may want to turn it over a few times and evenly cover it in wheat flour in order to stop it sticking to the loaf tin. The flat surface also helps shape the dough. When it’s a nice shape and size, tip the soft dough onto one hand (and wrist) to support it, lift it up and pop it into the loaf tin. Leave it somewhere around 20-25C / 68-77F for 12 hours. During this time the loaf will prove and crack over it’s surface, developing a savoury, bitter flavour.

Rye loaf pre-prove.
Step 3.

Rye loaf post-prove.
After 12 hours are up, turn your oven on at 250c / 480F and place a tray in the bottom of it. Your loaf should have risen to fill the tin (as seen in the image above). If it hasn’t then you can give it a few more hours. Once your oven is up to temperature, carefully open the door (the heat will hit you like a furnace and curl your eyebrows) and pour 200ml of water onto the tray. Quickly add your rye loaf to the middle shelf and shut the oven door. Reduce the heat to 220C / 430F and set a timer for 40 minutes. During the bake, the water will evaporate and keep the crust from over developing in the high temperatures. After 20 minutes the water should have fully evaporated and the loaf will begin to darken. After 40 minutes, remove the loaf from the oven and depan it. Tap the bottom of it and listen closely. If it sounds hollow then the bread is cooked. If it still sounds dense then give it another 5 minutes in the oven.

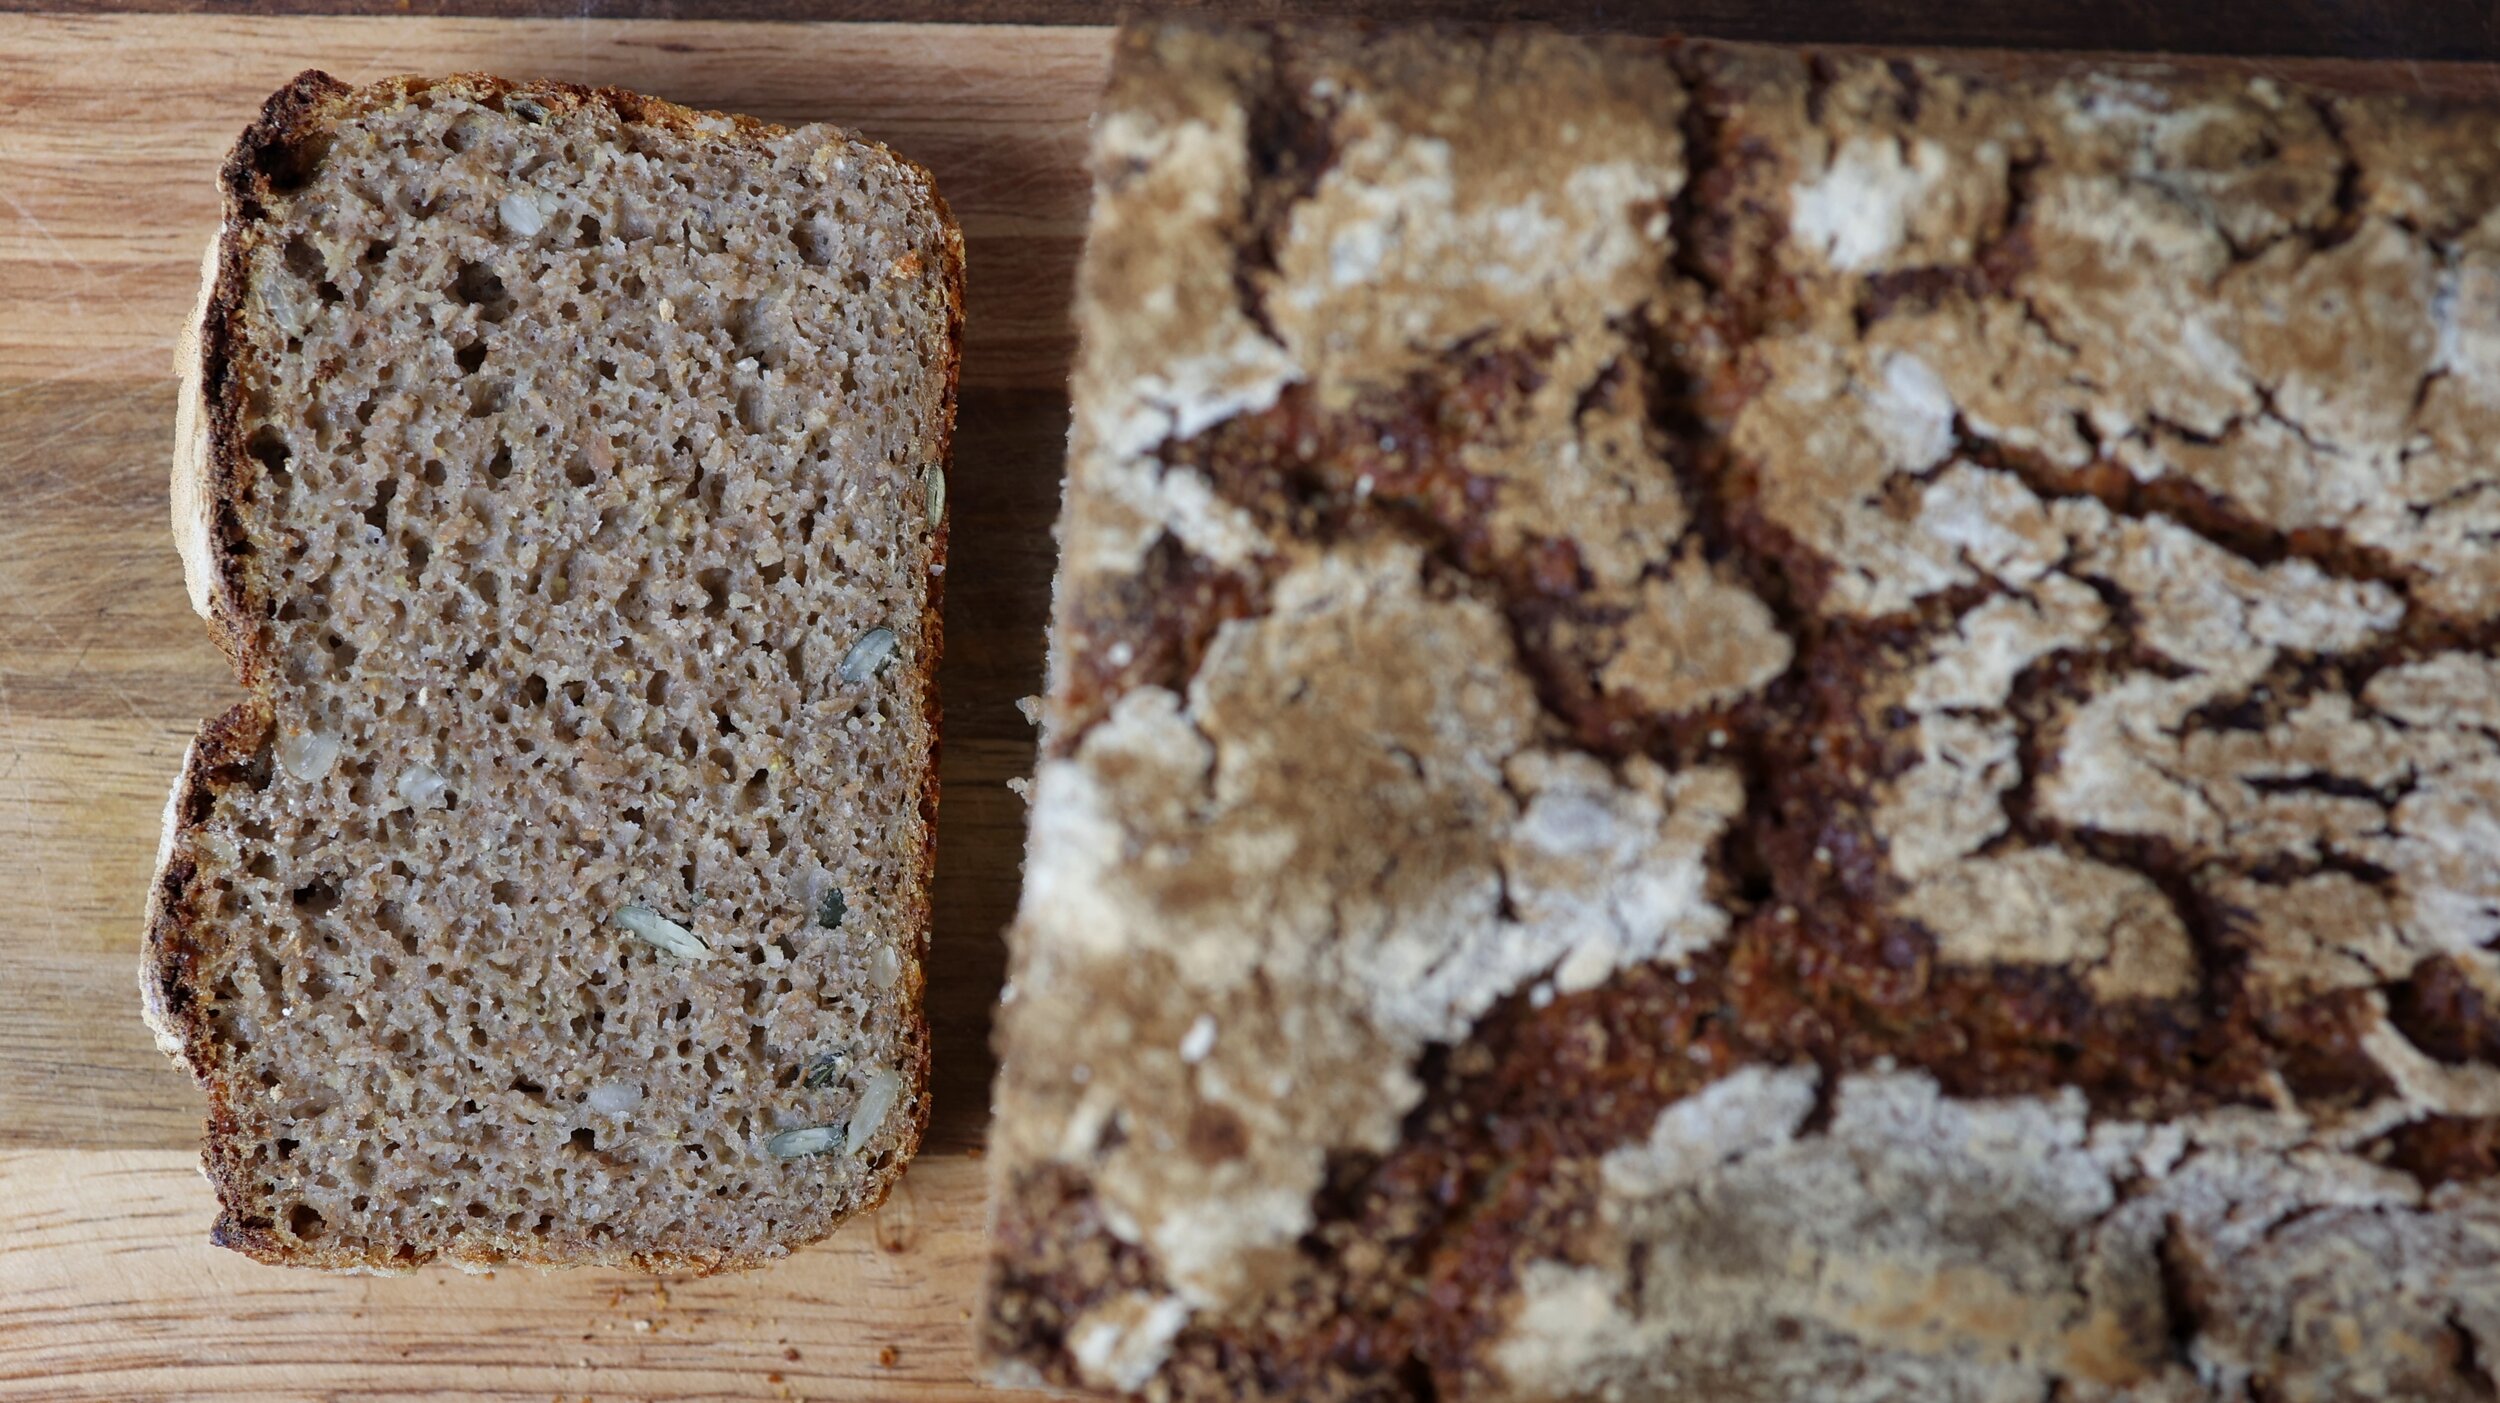
Once cooked, place it on a cooling rack and leave it to stand for a couple of hours before cutting it. As tempting as it is, cutting bread (particularly a soft, sticky loaf like rye) before it has finished cooling isn’t good practice and you will end up with a chewy, steamed loaf. Some people say that eating bread before it has cooled can cause indigestion too from the unset gluten or chance of active yeasts still alive in the loaf. I haven’t personally encountered this, but I do find that the exposed face of the crumb (the middle of the loaf) boils as steam escapes, ruining the texture as deeply as a 3-4cm into the bread.
I hope you have enjoyed this recipe for one of the oldest most simple breads I’ve ever encountered. I believe more people should eat rye, particularly wholemeal organic rye. Please let us know in the comments if you’ve made this recipe and what you love eating your rye sourdough with.
